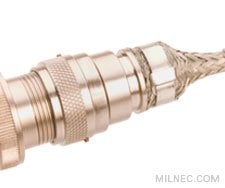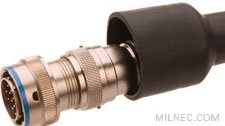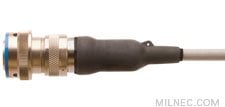
A shrink boot is a simple but effective alternative to a metal backshell that provides strain relief and environmental sealing for applications requiring a low-profile backshell and easy installation. To use a shrink boot with a connector, the boot must be installed in conjunction with a specially designed boot adapter to environmentally seal the jacketed cable and the connector.
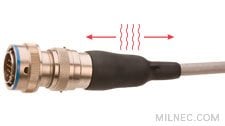
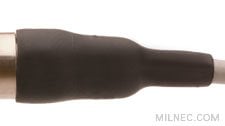
A shrink boot adapter attaches to a connector’s accessory threads via a spin coupling, which permits the adapter to be attached and removed without twisting or binding the cable. The adapter provides a specially designed gripping area or platform to accommodate the lip of a shrink boot. The semi-flexible, low-smoke, flame retardant polyolefin boot features an inner adhesive that bonds to the adapter. When heat is applied with a heat gun or other heat source, the boot shrinks and self-adheres to the adaptor and cable, forming the environmental seal. The recovered shrink boot’s firm grip on the jacketed cable and on the boot adapter offers excellent strain relief.
Whenever a shrink boot is used with an EMI/RFI adapter, the wire braid that shields the cable must be banded to the adapter in order to ground the connector. A special banding tool creates a quick and reliable clamp that terminates the wire shield to the adapter and ensures EMI/RFI protection.
Basic Shrink Boot & Banding Instructions
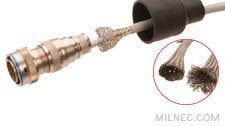
- After contact termination is complete, slide the boot adapter and shrink boot up the cable and attach the adapter to the rear end of the wired connector. If using the EMI/RFI boot adapter, be sure to strip the wire jacket back enough to expose sufficient shielding to fit over the termination platform. Prepare the exposed shield by folding back or inverting the wire braids (fish-mouthing) to provide for correct length and finished look. (If using a basic boot adapter, start at step 6.)
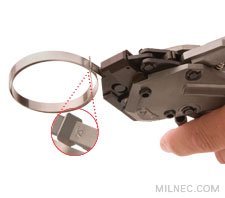
- Create a double-wrapped loop in the termination band by feeding the end of it through the narrow slot on the buckle twice. Pull on the tail of the band to reduce the loop until the start mark has been pulled through the buckle. Squeeze the release lever of the banding tool and insert the band tail into the tool up to the start mark.
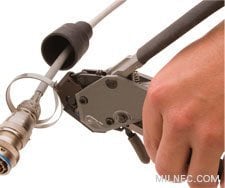
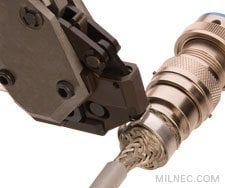
- Slide the shield over the adapter, then slide the band over the shield and rest it on the banding platform. Repeatedly squeeze the pull-up handle to tighten the band. Always allow the pull-up handle to return to its original position after each stroke. Correct tension on the band has been reached when the handle locks against the tool body.
- Once the handle has locked against the tool body to signify that the band is at the right tension, squeeze the cut-off handle (top handle) once to lock the band and trim excess material. Afterward, the tension handle will release. Remove the band from the tool.
- Inspect the terminated shield to be sure that it is properly seated on the adapter. If re-banding is necessary, the installed band can be removed by prying up the tab on the buckle.
- Abrade the surface of the cable jacket to be covered by the shrink boot with #320 grit emery cloth and clean the surface with isopropyl alcohol. When ready, position the boot so that the lip will shrink or “recover” into the groove of the adapter.
- Apply heat evenly around the boot at the adapter end and ensure that the lip of the boot fits tightly into the groove of the adapter. Then, heat down the body of the boot toward the cable end. Apply heat in brush-like strokes, ensuring the last part to recover is the back end. After the boot is fully recovered, apply additional heat to the adapter end to ensure that the adhesive lining has bonded.
- After the boot has cooled, inspect it for proper installation. The boot should be free from scorching or blisters and the lip of the boot should be seated firmly into the adapter groove. A thin seam of adhesive should be visible between the boot and the cable jacket at the back end of the boot.
